


 Lifestyle
How Happy Haircuts Happen

by Mark Arnold
on 12th April, 2022
Recently added item(s) ×
You have no items in your shopping cart.
Transforming a piece of outdated & unloved furniture isn’t as hard as you may think - not only is it cheaper and more personalised to our taste, but it is also incredibly satisfying – after a few attempts you may catch the, ‘bug’, and no unpainted wood will ever be safe again!
Sourcing furniture is half the fun of it & can be done in the comfort of your own home by trawling through buy & sell pages of websites like Gumtree, Ebay, local Facebook sale sites, Freeads and Preloved, to name a few.
Once you’ve got your hands on something to transform, it’s time to buy some paint and get creative.
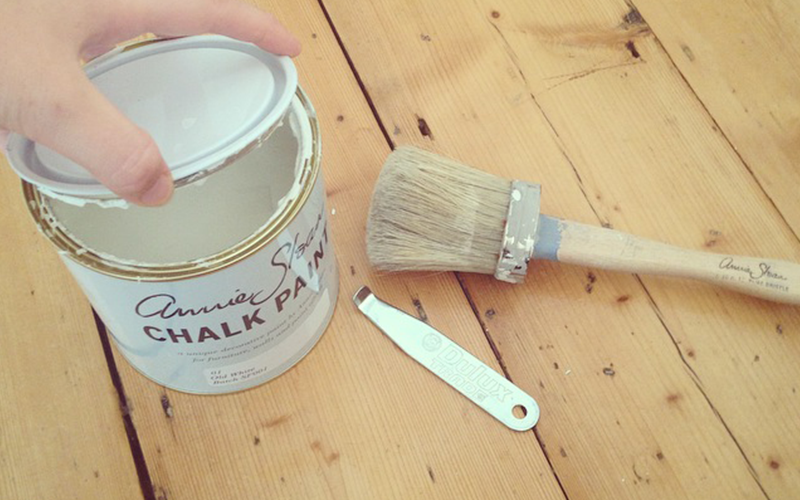
Chalk paint has become incredibly popular throughout the past couple of years for up-cycling furniture.
Brands such as Annie Sloan, Rust-Oleum & Authentico have recently taken centre stage when it comes to all things upcycled.
Unlike traditional paints, it doesn’t require any preparation such as sanding, undercoating or priming; it is designed to go on almost any material, paint from wood to plastic or metal; it suitable for internal or external use; it covers easily, dries quickly and helps you achieve a beautiful finish that is perfect for distressing.
Step 1: Make sure the item to be painted is clean & dry as well as removing any hardware, such as handles or hinges that you don’t want to paint.
Step 2: Get painting – this is the enjoyable and rather therapeutic part! As chalk paint is quite forgiving there is no need to be too precise! Depending on the original colour, you may need a couple of coats - you should be able to tell how it’s covering immediately, and thankfully chalk paint dries quite quickly.
Tip: If at any point you need to pause your painting project then just pop the lid back on the paint & wrap the paintbrush in some cling film or a plastic bag to stop it drying out.
Step 3: Once your final coat has dried, put your hardware back on - you could even try replacing handles with new ones which you’ll find in most DIY shops!
Step 1: Gently sand the edges with a fine grit sandpaper until you get your desired look.
Step 2: Rub some furniture wax over the piece to seal and gently buff this in with an old rag - this will help protect it against any knocks or spills.
Tip: Focus in the parts of the furniture that would tend to age naturally over time, such as edges and corners.
Your up-cycling project is complete – enjoy!
Real life stories, issues and experiences of day to day life by special needs parents and
healthcare professionals.
Lifestyle
by Mark Arnold
on 12th April, 2022
 Lifestyle

by Sharon Galitzer (Physical Therapist)
on 12th April, 2022

For Firefly, life is all about experiences and being face to face with friends and loved ones. By enhancing the child's perspective and giving them the tools to 'join in', the child not only has the opportunity to participate, but can also be at the heart of it.
View Firefly’s ProfileWould you like to write for Firefly? Join our blogger network of parents, therapists and professionals.
Get In TouchJoin over 40,000 subscribers to our weekly newsletter with insightful articles just when you need them.
Join Mailing ListInsurance Funding
Please wait...
